[javaScript] To-do List 만들기 (전체 삭제 기능, 할 일 정렬)
To-do List 만들기
저번에 만든 to-do List 기능에 이어서 더 추가적인 기능들을 구현해 보겠습니다.
주요 기능
- ’+’ 버튼으로 할 일을 추가한다.
- ’-‘ 버튼으로 할 일을 삭제한다.
- 완료된 할 일을 체크하거나 체크 해제한다.
- 할 일 목록이 페이지 새로고침 후에도 유지된다.
- ‘CLEAR’ 버튼으로 할 일을 전체삭제한다.
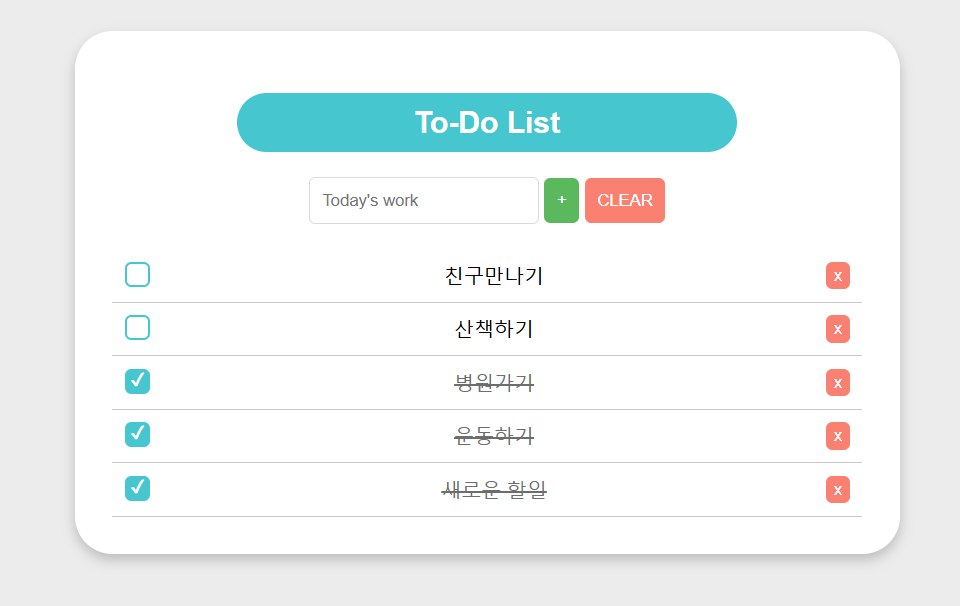
- 완료된 할 일은 리스트의 가장 아래로 이동한다.
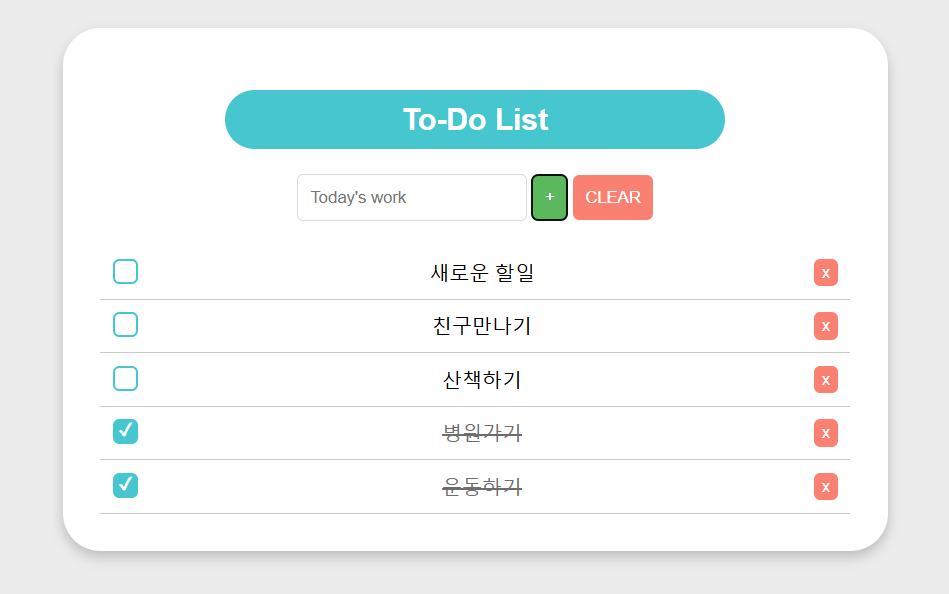
- 추가된 할 일은 리스트의 가장 위에 추가된다.
구현하기
새로 추가 될 기능인 5, 6, 7번 기능을 구현해 보겠습니다.
구현할 기능
- ‘CLEAR’ 버튼으로 할 일을 전체삭제한다.
- 완료된 할 일은 리스트의 가장 아래로 이동한다.
- 추가된 할 일은 리스트의 가장 위에 추가된다.
사전지식
- prepend 함수
구현 이미지
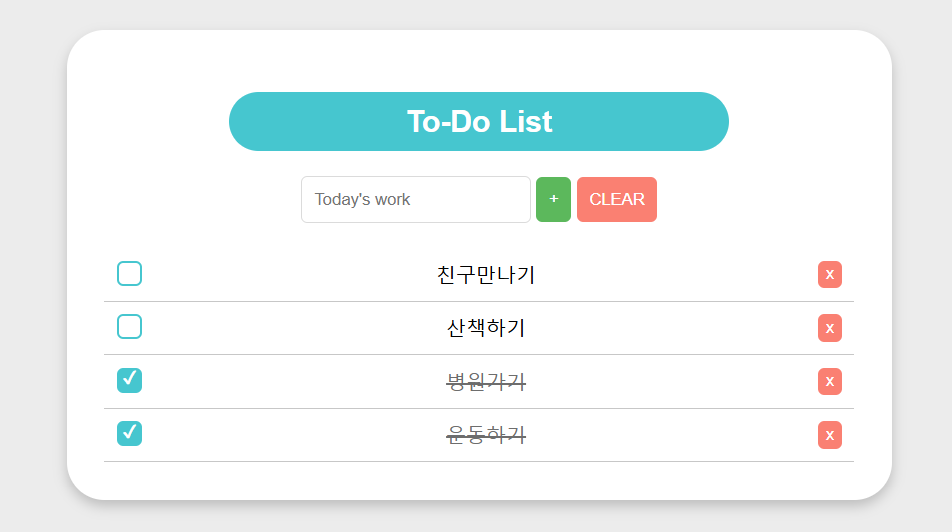
[새로운 할 일이 추가되었을 때]
[새로운 할 일을 체크했을 때]
코드
javaScript
document.addEventListener("DOMContentLoaded", () => { // DOM이 로드되면 실행
    const listform = document.getElementById("listform"); //할일 리스트의 <from> 요소를 저장하는 변수
    const todoList = document.getElementById("todoList"); //추가한 할일 목록 요소 <ul>이 저장되는 변수
    const textInput = document.getElementById("textInput"); //텍스트 입력하는 요소 <input>이 저장되는 변수
    const clearAllButton = document.getElementById("clearAllButton"); //전체 삭제 버튼

    // LocalStorage에서 할 일 목록을 불러와 화면에 표시
    let todos = JSON.parse(localStorage.getItem("todos")) || [];
    renderTodos();

    // 추가 기능
    listform.addEventListener("submit", (e) => {//submit 버튼을 누르면 실행
        e.preventDefault(); //페이지 새로고침 방지(디폴트 행동 취소)

        const todoText = textInput.value.trim(); // 할 일을 가져오고 공백제거: trim()
        if(todoText === "") return; // 텍스트 창이 비어있으면 실행 X

        // 새로운 할 일 객체를 생성하고 배열에 추가
        const newTodo = { text: todoText, completed: false };
        todos.unshift(newTodo); // 새 할 일을 배열의 맨 앞에 추가
        saveTodos();

        // 화면에 할 일 항목 추가
        addTodoToList(newTodo, true); // 새 할 일을 리스트의 맨 위에 추가
        textInput.value = ""; // 입력 필드 초기화
    });

    // 삭제 및 체크 기능
    todoList.addEventListener("click", (e) => {// 클릭했을때
        if (e.target.classList.contains("deleteButton")){ // 삭제버튼을 클릭했다면
            const li = e.target.parentElement;
            const index = Array.from(todoList.children).indexOf(li);
            todos.splice(index, 1); // 배열에서 해당 할 일 삭제
            saveTodos(); // 변경사항 저장
            li.remove(); // 화면에서 항목 제거
        }

        // 체크 버튼 클릭 시: 체크추가, 가로줄추가
        if (e.target.classList.contains("checkButton")) {
            const li = e.target.parentElement;
            const index = Array.from(todoList.children).indexOf(li);
            const span = e.target.nextElementSibling;

            todos[index].completed = !todos[index].completed; // 완료 상태 토글
            saveTodos(); // 변경사항 저장

            e.target.classList.toggle("checked"); //체크
            span.classList.toggle("completed"); //체크해제

            // 체크된 할 일을 목록의 가장 아래로 이동
            if (todos[index].completed){
                todoList.appendChild(li);
            }
            else {
                todoList.prepend(li);
            }
        }
    });

    // 전체삭제 기능
    clearAllButton.addEventListener("click", ()=>{
        todos = []; // 할일 목록 초기화
        saveTodos(); // localStorage 초기화
        todoList.innerHTML = ""; // 화면 초기화
    });

    // 할 일 목록을 화면에 표시하는 함수
    function renderTodos() {
        todoList.innerHTML = ""; // 기존 목록 초기화
        todos.forEach((todo) => addTodoToList(todo)); // 각 할 일 항목을 화면에 추가
    }

    // 할 일 항목을 <ul>에 추가하는 함수
    function addTodoToList(todo, prepend = false) {
        const li = document.createElement("li");
        li.innerHTML = `
            <button class="checkButton ${todo.completed ? "checked" : ""}"></button>
            <span class="${todo.completed ? "completed" : ""}">${todo.text}</span>
            <button class="deleteButton">x</button>
        `;

        // 새로운 할 일을 할일 목록 맨 위에 추가
        if (prepend) {
            todoList.prepend(li);
        }
        else {
            todoList.appendChild(li);
        }
    }

    // LocalStorage에 할 일 목록을 저장하는 함수
    function saveTodos() {
        localStorage.setItem("todos", JSON.stringify(todos));
    }
});
HTML
<!DOCTYPE html>
<html lang="en">
<head>
    <meta charset="UTF-8">
    <meta name="viewport" content="width=device-width, initial-scale=1.0">
    <title>To-Do List</title>
    <link rel="stylesheet" href="style.css">
</head>
<body>
    <div class="container">
        <h2>To-Do List</h2>
        <form id="listform">
            <input type="text" id="textInput" placeholder="Today's work">
            <button type="submit" class="submitButton">+</button>
            <button id="clearAllButton">CLEAR</button> <!--전체삭제 버튼 추가-->
        </form>
        <ul id="todoList"></ul>
    </div>
    <script src="script.js"></script>
</body>
</html>
CSS
CSS파일에 아래 코드를 추가한다.
#clearAllButton {
    padding: 10px;
    background-color: salmon;
    color: white;
    border: none;
    border-radius: 5px;
    cursor: pointer;
}

#clearAllButton:hover {
    background-color: rgb(255, 113, 98);
}
다음에는 React를 이용해 지금까지 구현한 To-do List를 앱으로 만들어 보겠습니다.
댓글남기기